The Driver's page is where you can create and manage your company's drivers, review driver's scores, and monitor coaching within your fleet. This guide will detail both Driver ID and the accompanying Drivers feature on DV6, explaining all features that come with Driver ID.

Enabling Driver ID
When Driver ID cards are purchased, Rosco's production team contacts the System Administrator to activate the feature fleet-wide.
After activation, fleet managers or customer support teams can enable Driver ID for specific vehicles within the fleet.
Note: Vehicles with Driver ID enabled will prompt drivers to scan their ID upon every startup. Only enable this for vehicles where Driver ID will be used.
To enable: Go to Fleet Settings > Driver ID Enabled.
Once enabled, the setting will appear in the vehicle's profile.


You can choose which vehicles or groups will have Driver ID enabled.

Types of Driver ID
There are three available types:
- Physical ID Card (DV604B)
Includes printed QR code ad hexadecimal ID associated with it.
Six cards are issued per driver.

- Rosco Driver App
Downloadable via the App Store or Google Play.

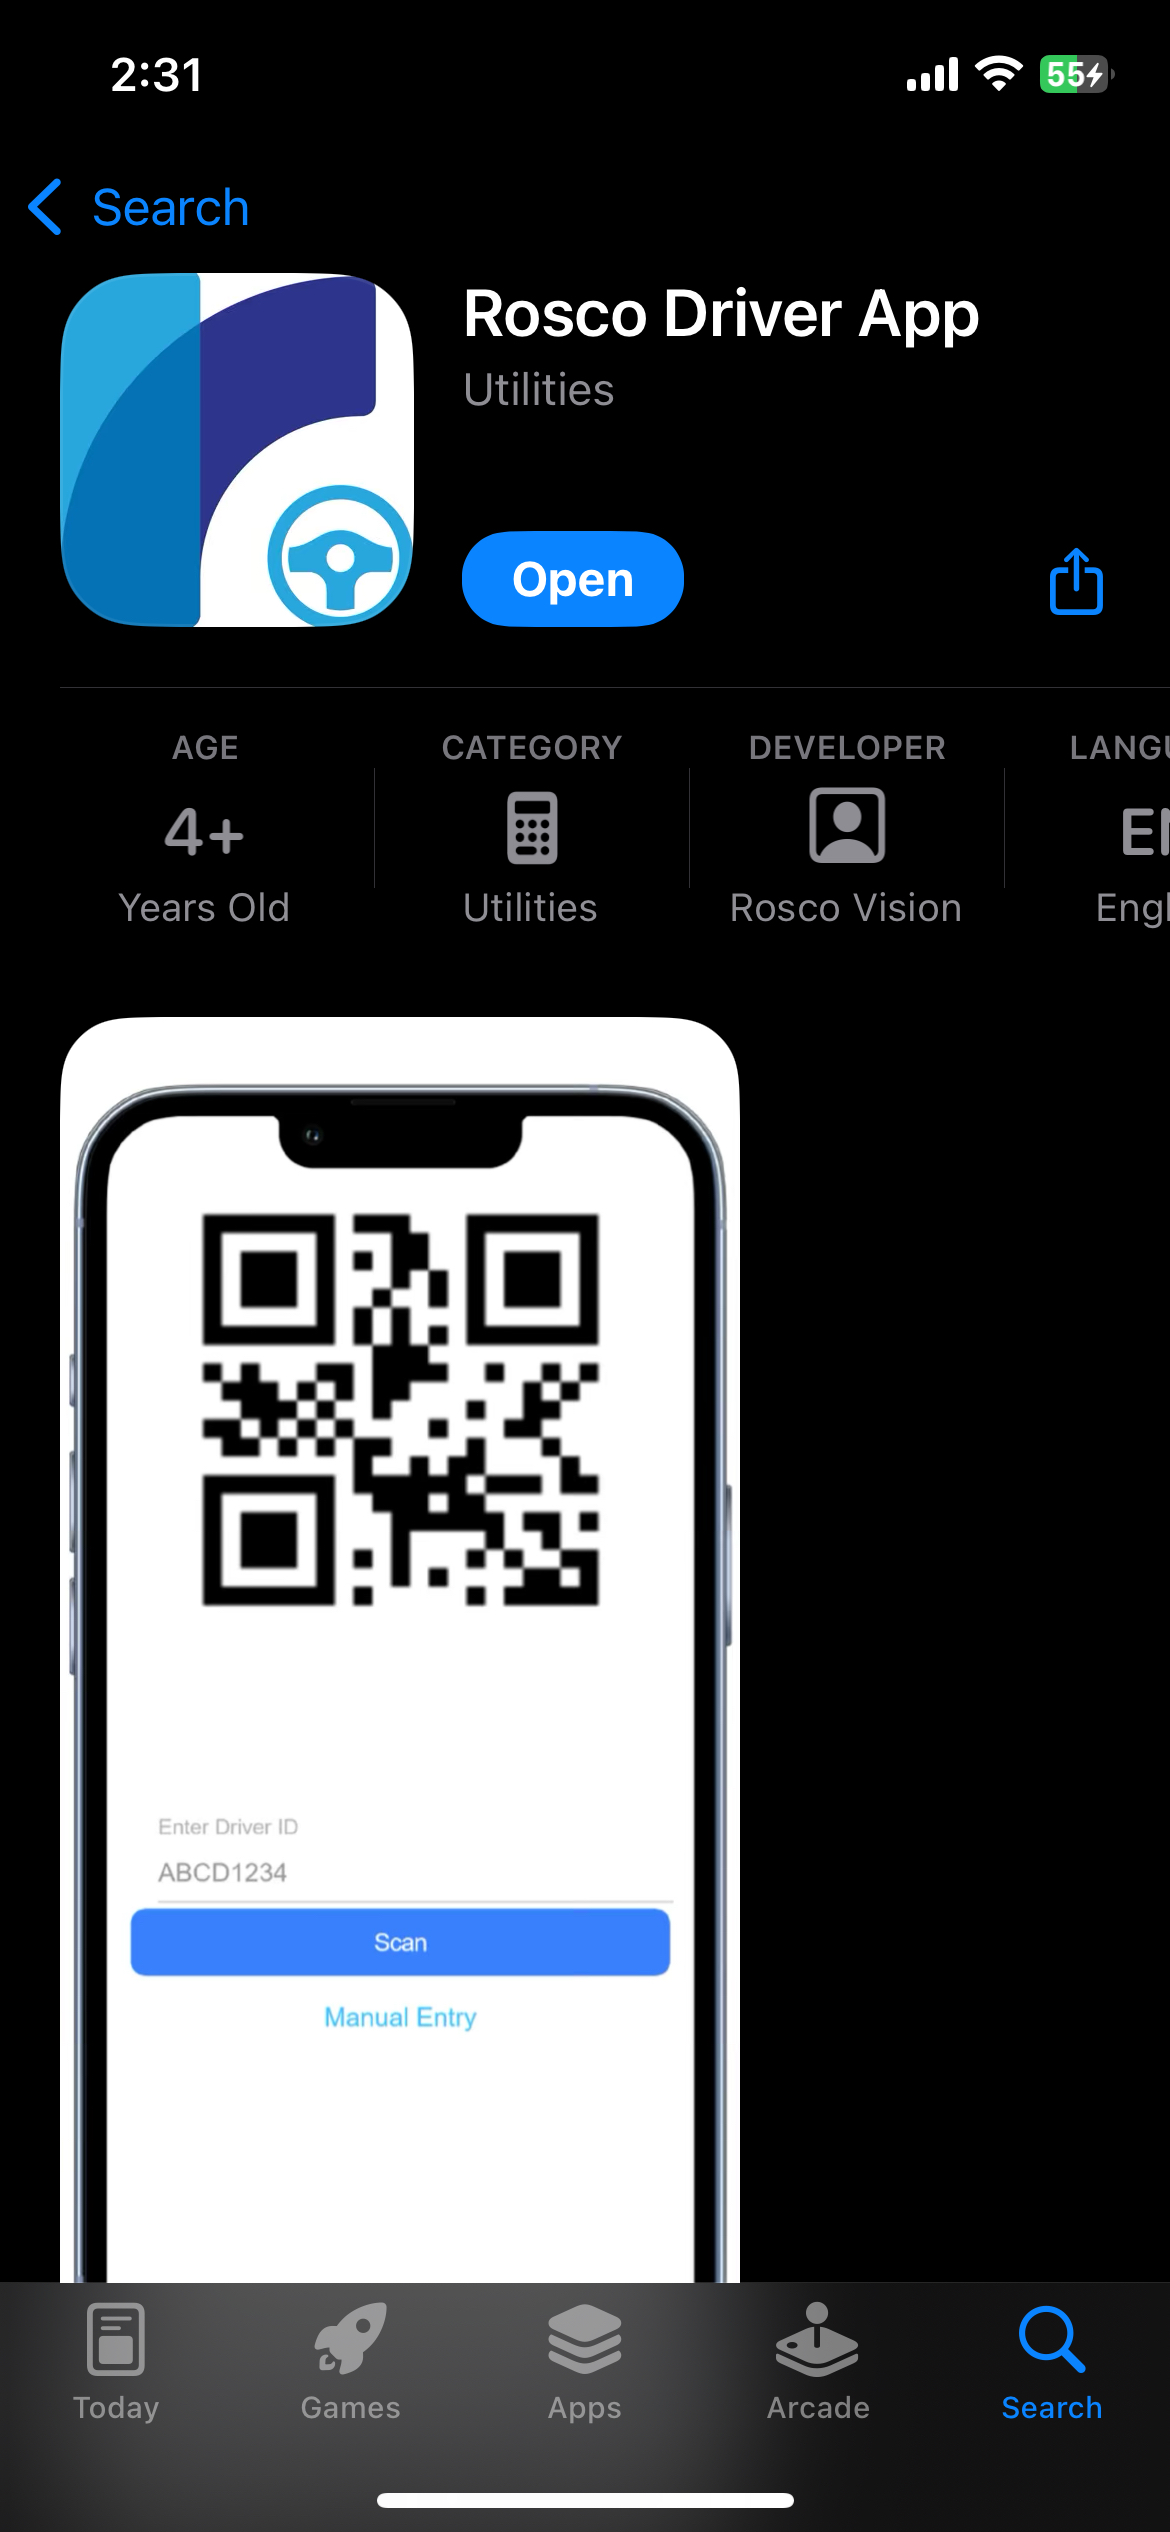

Allow drivers to enter the card ID and display a scannable QR code.
Manual entry is available: Enter the hexadecimal ID > Tap "Generate."


- Emailed QR Code
Fleet managers can email drivers a scannable QR code when adding or editing drivers.
Drivers can use this email, or a screenshot, to scan QR code.
When adding driver:

When editing driver:

The Driver will receive the following email from the server:

Adding Drivers
Video Tutorial: YouTube Link
Adding Drivers Individually
Click Drivers > Add a New Driver:


Enter the driver's following information:
- First Name
- Last Name
- Assigned Group
- Card ID (hexadecimal)
- Select Send QR Code if desired

Adding Drivers in Bulk
You are also able to upload drivers in bulk using what is known as a Comma Separated Value (CSV) file.
Click Drivers > Add A New Driver > Upload Drivers > Example Driver File


This will download an example csv file. You can use this file as a template

Upload the completed file using the same

Tip: Ensure correct formatting, group names, and headers to avoid upload errors
Managing Drivers
In the Drivers page, you can select any driver to open the Edit Driver menu.


In this menu, you can:
- Update name, email, group, or card ID
- Send QR Code again
- Delete the driver record
Using Driver ID as a driver
- After ~25 seconds of boot-up, the device prompts: "Scan Driver ID"
- Hold QR code 6–12 inches from the lens
- Confirmation: "Driver ID Scanned" audio prompt
Note: Scanning is disabled above 10 mph (16 kph) In low light, use cab lights to assist scanning
Events Tracking
When an event occurs and a driver has scanned in:
- The driver's name is tagged to the event in RoscoLive
- A "Driver" column can be added to the Events tab
- Driver-specific events affect individual scores
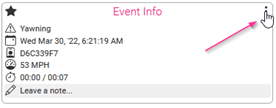
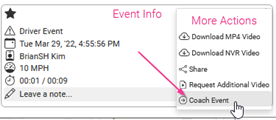
Example Images:


Scoring
Driver scores range from 0 to 200 (0 = best).
Score Calculation:
Score = ([(e0 × w0) + (e1 × w1) + ...] / miles) × coefficient
- e: number of event occurrences
- w: event weight
- miles: miles driven
- coefficient: normalizing factor
Example: 5 distraction events with a weight of 3 over 100 miles = 8.
A driver has driven 100 miles in the last week and has had 5 distraction events over that course and the distraction event has a weight of 3. The calculation would be:
total distraction score = 5 distraction x 3 weight = 15
(15 / 100 miles) * scoring coefficient = 8
So, this driver would have a score of approximately 8 for this period. Notice there is a scoring coefficient we use to normalize the score to fit the range 0 - 200.
Score Table:
- Displays each driver’s score for selected date range (default: current month)
- Click a driver to view individual events
- Exportable to CSV

The table shows the driver's overall score for the date-range selected. By default, the date-range is the current month to date. This can be adjusted by clicking the date range picker at the top of the page.

Clicking on a driver will open a sub-table where it itemizes the individual events that have contributed to their overall score.
Adjust Event Weights:
- Access via Adjust Event Weights
- By default, all event weights are 1
- Drag sliders to modify impact
- Toggle off to exclude an event from scoring
- Apply changes to update scores instantly


Coaching
The Coaching page tracks coaching sessions.

Types of Coaching:
- Event Coaching
To schedule a coaching session based on an event, select the event in question and in the video, player open the Actions menu by clicking the 3 dots at the top right.

- Score Coaching
Schedule based on driver’s score from the Scoring page.


When scheduling a coaching session, the following information can be entered:
- Coaching Deadline
- Coach Email
- Driver Email (optional)
- Additional Notes (optional)

Coaching Status:
- Incomplete – Not yet completed
- Complete – Finished
- Overdue – Missed deadline; sends reminder email